Wednesday, August 26, 2015

Perfect Panko Chicken Strips

I admit I cannot take full credit for this recipe, as I used the back of the Kikkoman Panko box as my foundation. But I do believe I've discovered perfection in modifying a few ingredients. An asterisk (*) indicates a key ingredient for perfection.

1 pound chicken breast tenders
1/3 cups coconut flour*
3/4 teaspoon salt
1/2 teaspoon black pepper
3 large eggs
1-1/2 cups Kikkoman Panko Bread Crumbs or Whole Wheat Panko
Coconut oil*

Beat eggs in a medium bowl until frothy. Mix coconut flour, salt and pepper in another medium bowl. Dredge chicken in coconut flour, shake off excess. Dip chicken into eggs, then press chicken into Panko; turn chicken over and press into Panko again to coat both sides. Pour enough coconut oil into heavy large pot to reach depth of 1-2 inches; heat 350°F. Working in batches, add chicken to hot oil; deep-fry until golden brown. Flip if necessary. Using tongs transfer chicken to paper towels to drain.

MODIFICATIONS: Try using shrimp in place of chicken (as indicated on the box), and/or try dried unsweetened coconut in place of panko.
 

Tuesday, December 30, 2014

Mexican Chicken Tortilla Soup

I also add 1 can diced tomatoes, with or w/o green chilies.

Friday, April 18, 2014

Blue Cheese Bacon Macaroni and Cheese

Prep Time: 5 minutes
Cook Time: 25 minutes
Total Time: 30 minutes
Yield: About 3-4 servings
Ingredients
o    8 strips (about 1/2 lb.) bacon, diced
o    1 (12-ounce) can 2% evaporated milk
o    1 large egg
o    1/2 tsp. salt
o    1/4 tsp. ground black pepper
o    pinch of cayenne
o    8 oz. elbow macaroni (I used DeLallo whole wheat)
o    1 Tbsp. butter
o    5 oz. crumbled blue cheese
o    4 oz. freshly-grated sharp white cheddar cheese
Method
Heat bacon in a skillet over medium-high heat for about 5-7 minutes, stirring frequently, until crispy.
In a separate bowl, whisk together evaporated milk, egg, salt, pepper and cayenne until combined. Set aside.
Meanwhile, bring a large pot of salted water to a boil, and cook the pasta al dente according to package instructions. When the pasta is cooked, drain it and then return it to the pot and reduce heat to medium-low. Immediately add the butter, and toss until the butter is melted. Pour in the evaporated milk mixture and stir until combined. Continue cooking over medium-high heat, stirring occasionally, for about 3-5 minutes, or until the sauce comes to a simmer.

Remove pan from heat and add in the cheeses. Stir until melted, then stir in the cooked bacon. Serve immediately, garnished with extra bacon and blue cheese if desired.

Sunday, February 2, 2014

Dark Chocolate Greek Yogurt Fruit Dip with Cinnamon


Prep time
Total time
 
This fruit dip is easy to make, healthy AND decadent. It’s the perfect dip to make when company is coming over for coffee or drinks. The cayenne pepper in the recipe is optional. Try adding a tiny pinch, mix it in and then taste. You shouldn’t be able to tell it’s there. It’s just a little background tingle that makes the dip extra special.
Author: 
Recipe type: dessert
Serves: 4
Ingredients
  • ½ cup Greek Yogurt
  • 2 Tbsp. cocoa powder
  • 3 Tbsp. brown sugar
  • ½ tsp. vanilla
  • ½ tsp. ground cinnamon
  • a tiny pinch of cayenne pepper (optional)
  • fresh berries, marshmallows and sweet biscuits (for dipping)


Instructions
  1. Combine all ingredients in a medium-sized bowl. Stir until it is an even dark color and all of the brown sugar granules have dissolved, about 3 minutes. Serve with fresh berries, marshmallows and sweet biscuits for dipping.

Tuesday, December 31, 2013

Beer Cheese Soup

2 C. diced potatoes                                                         
2 C. milk and ½ C. flour   OR 1 C. milk/or 1 can evaporated mile + 1 can cream  soup, mushroom, celery, etc.
1 ½ C. chopped onion*                                                
1 C. chopped celery                                                        
1 C. sliced carrots                                                          
12 oz. (3 C.) shredded Cheddar cheese
2 C. water + 6 chicken bouillon OR 2 C. water + 1 pkg. onion soup mix* (can substitute for onion)
½ stick butter or margarine, if desired                             
1 tsp. prepared mustard
1/8 tsp. cayenne pepper or red pepper flakes                 
1 tsp. Worcestershire sauce
1 C.-1 can beer (at room temperature)

Combine vegetables, water, margarine/butter and bouillon/soup mix. Bring to a boil, reduce heat and simmer 30 mins. until vegetables are tender. Mix flour and milk, or milk and cream soup; blend into vegetable mixture. Add cheese, mustard, pepper and Worcestershire sauce. Cover and cook over medium heat until cheese melts, stirring occasionally so soup does not stick. Stir in beer and serve.


Friday, November 29, 2013

Wahoo's Green Sauce

1/2 cup mayonnaise
1/2 cup sour cream
1 bunch cilantro
1-2 jalapenos
2 cloves of garlic
lime to taste
salt to taste

Puree first 5 ingredients in a food processor. Add lime and salt to taste. I would recommend about one half of a small lime--too much juice makes it runny.

Serve over fish or even chicken.

Cream Cheese Pumpkin Pie

Combine and mix:  1-8oz. pkg. softened cream cheese, 1/4 c. sugar; 1/2 tsp. vanilla; 1 egg. Pour onto bottom of unbaked 9 in. pastry shell.

Combine and mix well; pour carefully over cream cheese layer:
2 eggs, beaten well; 1/2 C. sugar; 1 1/4 C. canned pumpkin; (1 1/2 tsp. pumpkin pie spice or)
1 tsp. cinnamon; 1/4/ tsp. nutmeg; 1/4 tsp. ginger; 1 C. evaporated milk; dash salt.

Bake at 350 degrees for 65-70 mins.

Wednesday, September 4, 2013

Zucchini and Stuffing Casserole


Servings:  6-8

5 cups zucchini, chopped
1 medium onion, chopped
1 C. corn bread or other dry stuffing
1/2 cup sour cream
1 (10 1/2 ounce) can cream of chicken or mushroom soup

3/4 c. canned french fried onion rings
salt, pepper if desired
Directions:

Boil zucchini and onion for 5 minutes, drain. 
Stir in sour cream, cream soup, 1/2 C. french fried onion rings, seasonings and stuffing until well mixed. Top with remaining onions.  Bake at 350 degrees for 30 minutes, uncovered. Simple yet satisfying!

Monday, September 2, 2013

Our Bounty

Our Bounty with One Lone Carrot
It survived the mid-summer beagle plague...

...but it could not survive this.

Sunday, July 14, 2013

Not the Problem I'd Thought I'd Have

When I wrote my last post about gardening at the end of May, I was astonished at how fast things were growing and also wondering if I should not be getting so excited since that might have been as good as it got. Well, apparently rainy and cool weather paired with a little tomato food, peat moss, and cow manure does a garden well. I don't think I even hand-watered my garden once in the month of June, because we had so much rain.

Now I'm starting to wonder if I over-planted. I had to invest in some bamboo stakes and sturdy stretch tie to rein in the zucchini, cucumbers, and tomatoes. Someone with much more gardening wisdom than I told me that corn should be knee-high by the Fourth of July. Even if I'm standing on the same level, that's more like shoulder-high.
July 14, 2013
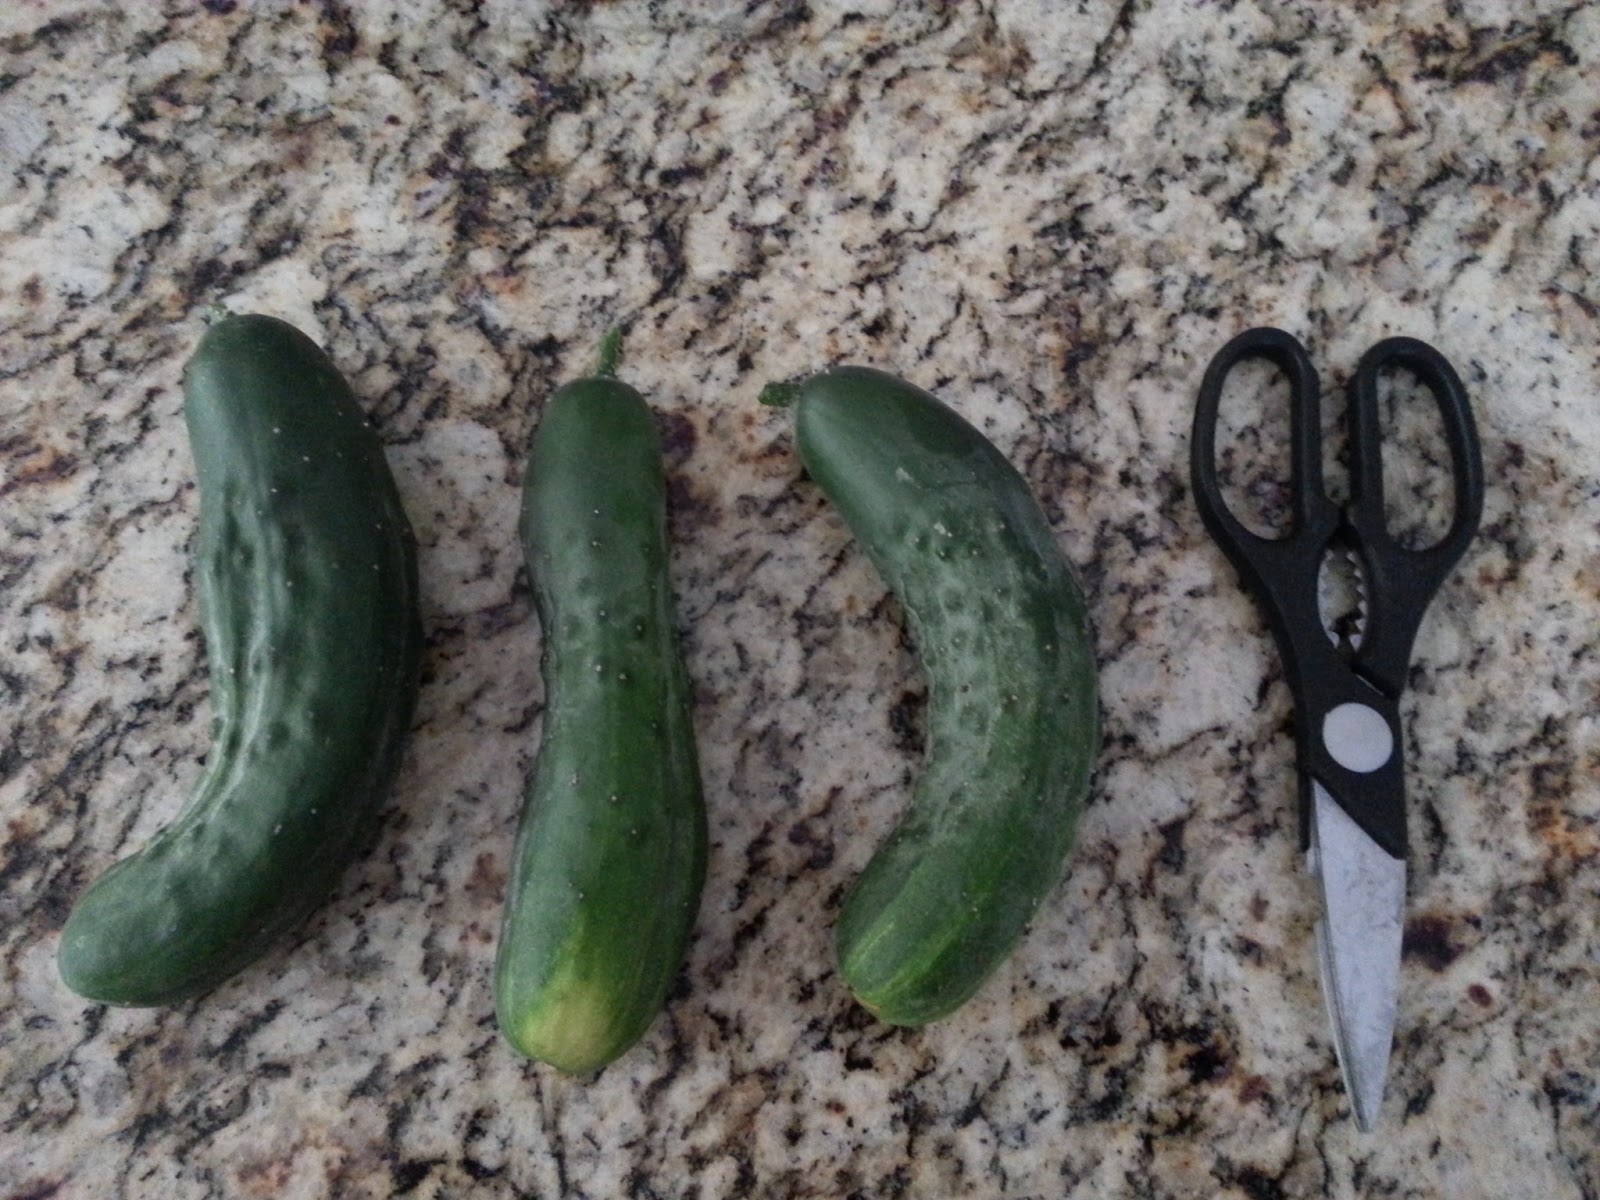
Here are some monsters that we pulled out today. Good thing I decided to water today or I might not have seen them.

The Three Amigos
Among all of the gazillions of green tomatoes, Caden spotted an orange one.

Which one of these is not like the other ones?
Again, really not the problem I thought I'd have in my rookie year. Three lessons I've learned for next year:
  1. Stake the tomatoes at time of planting (apparently this is common knowledge among the more experienced). I had no idea that bush variety tomatoes would grow this tall. 
  2. A "bush" variety is not the same as a "dwarf" variety.
  3. Apparently a zucchini plant -- even just one -- needs more than 4 squares. I had to cage it up, because it was shading my peppers and reaching into the corn. Perhaps it warrants its own special container. Same for the cukes.

Friday, June 28, 2013

Sweet Corn Tomalito

This is one of my faves. I take it as a potluck item and get rave reviews. I just wanted to add it to the blog for easy access.

http://allrecipes.com/recipe/sweet-corn-tomalito/detail.aspx

I did not have luck with the steaming, as I don't have a double boiler, so I use this highly recommended microwave cooking shortcut: Cook the tomalito, covered, for 7 min. at 30% power and then 4 min. at full power. (Obviously you'll want your dish to be microwave safe and forgo the aluminum foil).

Sunday, June 9, 2013

Cake Boss - Little Einsteins Rocket

When I asked Caden what kind of cake he wanted for his 3rd birthday, I was pretty sure I knew the answer. And it was in fact "a rocket." But not just any rocket that I could buy a cake mold for. It had to be the Little Einsteins rocket. So I did some research, and there were some ridiculously elaborate cakes complete with fondant sculptures of the kids. I knew that was a bit beyond my talents. But I did find a few more reasonable ideas.

I used this blog as my primary guide: http://andreasrecipes.com/little-einsteins-rocket-birthday-cake/. The hardest part of this project was definitely the engines constructed of ice cream cones cut with an X-acto knife (which I had to prop up with toothpicks. If I had to do it over, I'd have turned rocket 90 degrees). I didn't buy the oval cake pans because they were a tad expensive (not to mention that I would have to have had them shipped, and I just didn't get around to ordering them in time). Instead I used my pyrex oblong chafing dishes and trimmed the cakes into more oval-ish shapes. I also added a sheet cake base, so I had more cake and a nice grassy area for rocket and the LEs to rest upon.

I combed eBay for weeks trying to find figurines to use as cake toppers. But the last episode of the LEs was made in 2009, so the toys are now collectors items and selling for ridiculous amounts of money, so I settled upon some card stock cut-outs that I found here: http://a.dolimg.com/en-US/disneyjunior/media/pdf/coloring_and_create/djr_col_lte_characters.pdf.

Here is my final result:


And then we ate it.

Thursday, May 30, 2013

Novice Intro to Square Foot Gardening

I do realize this is a recipe blog, and this post is not a recipe per se, but I do hope that my gardening efforts will yield some produce that I can subsequently turn into recipes. So it's not an entirely irrelevant post.

After many years of shunning gardening, due to unpleasant childhood memories of weeding in the sweltering heat whilst being eaten alive by mosquitoes (it may well have only happened once or twice, but I recall it with horror), I decided to give it another go. After all, it wasn't all bad. I had taken for granted that we had garden fresh salads nearly every night during the summer, which I quite enjoyed. I probably didn't realize at the time how much better it tasted than had we bought it at the store. And at the time, I probably didn't care that it was much more nutrient rich.

Thus far, I'm feeling pretty pleased with myself. Since planting on Mother's day, my bedding plants have grown significantly larger, my corn and carrot seeds have begun to sprout, and I found a tiny tasty poblano pepper yesterday! I don't know why this amazes me. I grew a human being in my body, yet I'm more in awe of the fact that a seed would actually germinate in my garden. Perhaps this stems (pun intended) from the fact that I've never been successful at keeping a houseplant alive, and I've killed at least two basil plants in recent history.

May 12, 2013

May 30, 2013

Tiny Tasty Poblano Pepper

1st Herb Harvest
Today I did my first harvest of the season, which included leaf lettuce and herbs. Now in fairness, the herbs were more or less ready when I transplanted them, but there was a point when I thought the lettuce would not make it. It was looking quite sad after being trounced by a beagle, and who knows what else. But in the last couple weeks we got some nice warm weather and a significant amount of rain, and the lettuce rallied! We enjoyed it in a salad tonight! (Well at least Caden and I did. Larry merely ate his salad).


I would like to insert a disclaimer that I in no way claim to be an expert on square foot gardening, or any variety of garden, for that matter. Most of what I gleaned about this craft was done via Google a couple of nights before venturing to the nursery. But I must say, that so far I'm very impressed with this method. It's highly space-efficient, so you don't need much room. And it's contained, which makes that whole maintenance (i.e. weeding) thing much easier--haven't had to pluck one yet! So here are those sites that have inspired and guided me thus far:


Ask me again in a month if I feel the same way.You know, after the bugs and the hail, and the potential fruitless efforts. But for now, I'm sold on SFG!

Tuesday, March 12, 2013

Scallop & Garlic Linguine

This recipe is so delicious I just had to revive the blog with it! Healthy, quick, and scrumptious!

INGREDIENTS

  • ¾ pound bay scallops (can substitute 1 pound of chicken tenders or shrimp)
  • ¼ teaspoon kosher salt
  • ½ teaspoon black pepper
  • ½ teaspoon paprika
  • 8 oz whole wheat linguini
  • 1 Tablespoon olive oil – to cook scallops
  • ¼ cup olive oil
  • ¼ cup white wine (you can also substitute low sodium chicken or vegetable broth)
  • 3 garlic cloves, minced
  • Pinch of cayenne pepper
  • 1 lemon, zested and juiced to yield 2 Tablespoons of juice
  • ½ teaspoon kosher salt
  • ¼ teaspoon black pepper
  • 4 cups of kale, about 4 handfuls roughly chopped (you can also substitute spinach)
  • 3 tomatoes, cut into small dice

DIRECTIONS

  1. Lay scallops out on a flat surface and dry completely with paper towels. Season with salt, pepper and paprika – set aside.
  2. Bring a large pot of water with two heavy pinches of kosher salt to a boil. Add linguini and cook for about 8 minutes or until aldente. Drain and set aside.
  3. Heat a large sauté pan over medium heat and add 1 Tablespoon of olive oil. Once hot add in scallops and cook for 2 minutes; remove from pan with tongs and set aside.
  4. Add ¼ cup of olive oil to the pan; once warm, add in white wine, garlic, cayenne, lemon zest & juice, and salt & pepper. Stir to combine and simmer for 1 minute. Turn up the heat slightly and add in kale, cooked pasta, tomatoes, and scallops – toss to combine (tongs work best).
  5. Cook for 2 minutes or until kale is wilted and the pasta is hot.

Monday, July 23, 2012

Green Chile Casserole (Marian Moats)

2-7 oz. cans whole green chilies                               
1/3 C. flour
3 eggs, well-beaten
1/2 lb. shredded cheddar cheese & 1/2 lb. shredded Monterey Jack cheese (or you can get the Mexican cheese combination which has both already mixed together)
1 C. half and half or evaporated milk                       
1-8 oz. can tomato sauce
Mix flour, eggs and half and half. In another bowl, mix cheeses together. Drain peppers. In a 1.5 qt. casserole or 9 x 9 pan, layer in 3 layers: peppers, cheese, then flour mixture. After last layer, pour tomato sauce over top and sprinkle with 1/2 C. cheese. Bake at 375 degrees for 50 mins. or until firm and a knife inserted in the middle comes out clean.
Enjoy!

Thursday, July 12, 2012

"Dump" Chicken

Haven't posted for awhile but thought this link sounded interesting:  http://whenthedinnerbellrings.blogspot.com/2011/06/super-easy-way-to-getting-meals-ready.html
Looks like a good way to have some different chicken meals ready to go--kind of like your "make ahead" meals, Michelle.
Bon appetit!  Think I'll try some of these the next time I buy a big tray of chicken from Sam's; I have to bag and freeze it anyway.

Saturday, January 7, 2012

Corn Pudding


Dynasty Corn Pudding

ingredients:

4 oz (1 stick) unsalted butter, melted, plus additional for greasing
3 cups fresh corn kernels (from 4 to 5 ears), divided (or frozen, if fresh is not available)
2 eggs
1 cup sour cream
9 oz Monterey Jack (or pepper Jack cheese), cut into ½-inch cubes
½ cup cornmeal
1 (4-oz) can whole green chiles, drained, patted dry, and cut into ½-inch pieces
½ tsp salt
½ cup grated Parmesan cheese (I prefer Parmigiano-Reggiano)

At a glance:

Servings: 12
Active Time: 10 min
Total Time: 40 min


K
directions:

1. Preheat oven to 350°F. Generously butter a 2-quart rectangular casserole dish.

2. In a blender or food processor, puree 1 cup corn kernels with melted butter and eggs.

3. In a large bowl, combine all remaining ingredients except Parmesan. Add pureed corn and mix well. Pour into casserole dish, sprinkle with Parmesan, and bake for 30 minutes, or until puffed and golden.

Cook’s note: If the top isn’t browned but the pudding looks set, place it under a preheated broiler for a couple of minutes, until golden spots appear. Keep an eye on it so it doesn’t burn.

Mether's Note:  To save time and energy, I combined the cheese and sour cream with the pureed corn, melted butter and eggs in the food processor.  Judging by the way everyone ate it up, didn't make a significant difference!

Linda's Tips:

·  To add more bite, sprinkle in some hot sauce, like Frank’s RedHot.

·  For an even cheesier taste, mix in some cheddar.

·  Pair the pudding with a spinach salad and roasted chicken for dinner.

KITCHEN COUNTER:

Serves: 12 | Per Serving: 270 calories, 13g carbs, 9g protein, 20g fat, 85mg cholesterol, 510mg sodium, 1g fiber


Sunday, November 27, 2011

Shrimp Scampi/Shrimp Tacos

Okay, one basic recipe done two different ways.

For shrimp scampi:
1 lb large shrimp
2 TBS butter, melted
2-4 large garlic cloves minced
juice of 1 large lemon
1 tsp seasoned salt
freshly ground pepper to taste
1/4 cup parsley

1. Heat oven to 400 degrees. In medium baking dish, combine shrimp, butter, garlic, lemon juice, salt, pepper, and parsley. Bake 15 to 20 minutes until done. If you substitute smaller shrimp, check after 10 minutes.

2. Toss mixture with linguine.

Shrimp tacos:

1. For a taco variation, substitute cilantro for parsley and lime juice for lemon juice. Also add cumin to taste, about 1 tsp. Cook shrimp the same. Load up a tortilla with shrimp, cheese, cabbage, black beans, and salsa or whatever condiments you like.

Saturday, November 5, 2011

Green Chile Tortilla Scramble

Green Chile Tortilla ScrambleGREEN CHILE-TORTILLA SCRAMBLEAdapted from "Mollie Katzen's Sunlight Café"Preparation time: 25 minutesYield: 6 servingsA relatively long cooking process over strong heat–plus the addition of just a few choice seasonings–will transform green chiles and tortilla strips into an intense backdrop for scrambled eggs. My favorite garnish for this is a scattering of variously colored cherry tomatoes, which make it look every bit as compelling as it smells.Different chile powders have quite a range of flavor and heat. I use a very strong New Mexico chile powder; therefore I add only a little. You can adjust the amount of the chile powder to taste, depending on the type you are using.By "minced green chiles" I mean any combination of anaheims, poblanos, and jalapeños--all of which have a range of heat. For a milder flavor, remove and discard the seeds. (Wash your hands after handling these or any other hot peppers.) You can also substitute canned green chiles.
2 corn tortillas
1 1/2 tablespoons olive oil
1 heaping cup minced onion
1 cup minced green chiles
1/2 teaspoon pure ground chile powder
1/4 teaspoon salt
2 teaspoons minced garlic
1 cup cooked pinto beans (optional)
6 large eggs
Optional Toppings
Cherry tomatoes (cut in half, unless tiny)
Grated jack cheese
Sour cream
Guacamole
Salsa (any kind)
Cut the tortillas into small, thin strips about 1/2 inch wide with a knife or scissors, and set aside.Place a 10-inch skillet or sauté pan over medium heat. After several minutes, add 1 tablespoon of the olive oil, wait about 10 seconds, then swirl to coat the pan. Turn the heat up to medium-high, add the onions, and sauté for 5 minutes.Stir in the chiles, chile powder, and salt, and sauté for another 5 minutes, keeping the heat at medium-high.Add a little more olive oil (about 1 1/2 teaspoons), plus the garlic and tortilla strips. Cook and stir over medium-high heat for another 10 minutes, or until the vegetables are very tender and the tortillas turn a deep golden brown. Gently stir in the beans, if desired. Keep the pan hot.Break the eggs into a bowl and beat until smooth. Pour them into the hot pan, and scramble them into the vegetable-tortilla mixture. This will go quite quickly. Remove the pan from the heat when the eggs are mostly set but still moist. (They will continue cooking from their own heat, and we want to prevent them from becoming dry.)Serve hot, topped with cherry tomatoes, a light sprinkling of grated cheese, if desired, and/or additional toppings of your choice.
Also tasty with browned jalapeno sausage!